I recently bought a Boss RC-202 Loop Station, it's got two stereo tracks in a compact "desktop" form-factor, among many other nice features. The RC-202 is the smaller brother of the flagship RC-505 5-track looper from Boss, and shares many of the flagship features available in the RC-505.
I'm upgrading from a Boss RC-30, which has mostly the same looper capabilities (2 stereo tracks, same recording time, same bitrate) in a floor/stompbox form-factor, with the exception of MIDI connectivity and some new effects available in the RC-202.
MIDI support was main reason for the upgrade, because it allows me to sync the looper to my ever-growing array of digital toys. My setup has been growing from a simple guitar-and-effects rig to a more integrated station centered around the Novation Circuit synth as the brain for the DAW-less setup.
The Requirements
The RC-202 is a desktop loop station, which means that it's designed to be operated with your fingers, allowing for a much finer control than a simple two-pedal stompbox. However, I still need to be able to control some basic functions of the looper through a foot controller, to be able to use it while playing the guitar or any other instrument that requires both of my hands.
Luckily, the RC-202 supports external controls, but it's (artificially) limited in those. It supports 7 "switches" that can be assigned to one of 35 predefined functions, for example "Function #1: Switches track 1 between record/play", "Function #6: Clears track 2", and so on. However, there's a catch since the 7 "switches" are not all equal:
- 2 of them are for an external dual footswitch, such as the Boss FS-6, connected through a 1/4" TRS jack (CTL1+CTL2 input).
- 5 of them are for special MIDI Control Change (CC) messages that can be received through the MIDI IN connector and are fixed to CC 80 thru CC 84.
This means that by using a MIDI Foot Controller by itself we can only use 5 switches and assign them to 5 functions. If we'd wanted to assign 7 different controls, we would need to plug in a 5-switch controller through MIDI IN and a 2-switch external pedal through the CTL1+CTL2 TRS input.
Note: there's an 8th external control that can be mapped for an Expression Pedal (ex. Boss EV-30) to control things such as track volume or effect levels. However, there's only one input to connect either (a) 2 switches CTL1+CTL2 or (b) an EXP pedal. This is why I'm not considering it as an option, since I prefer two "buttons" than 1 "knob". If I require any fine tuning of some parameter, I prefer to do it by hand directly on the RC-202.
The complete list of assignments and functions is available in the Boss RC-202 Parameter Guide (EN).
The Options
There are many commercially available products that could work with the RC-202 with some limitations, but I have not been able to find a solution that does exactly what I have in mind.
I need to find a MIDI Foot Controller that has at least 5 foot switches and that allows for those switches to be mapped to the special MIDI CC messages numbers 80-84. I also need to balance between finding a compact solution, but that will also allow for future growth (in case I ever decide to upgrade to the RC-505).
Here are some of the options that I've thought of, in no particular order:
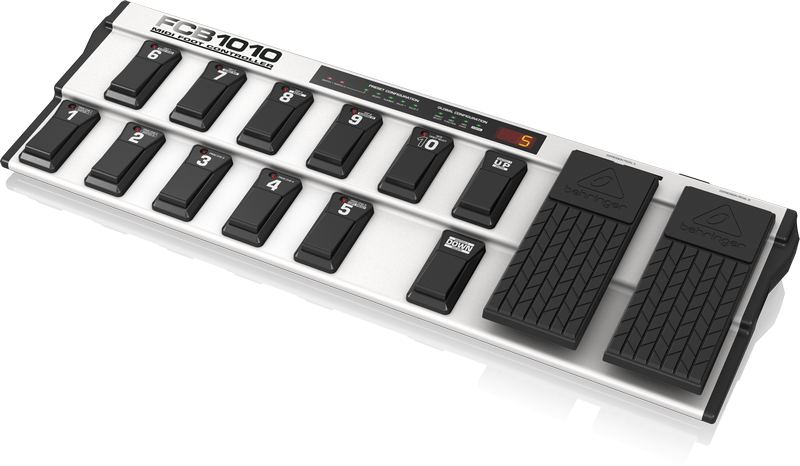
A. Behringer FCB 1010
This is probably the most popular foot controller at the time. It's a monster MIDI foot controller with a metal chasis that has 12 foot switches, 2 expression pedals, and some other configurable features. The device itself is pretty simple and it's possible to replace the chip inside of it to use a custom firmware to expand the factory capabilities of the device, such as the EurekaPROM fimrware, the UnO firmware or the UnO FCB505 firmware specifically made for the RC-505 loop station.
This controller can easily be found new from ~$180 USD, which is not actually cheap, but much much cheaper than its competition, making it the most popular controller in the market for this use case.
- Pros: easily available, excellent build quality, 12 switches, lots of information available, has MIDI Thru.
- Cons: too big at ~70cm wide, requires a firmware upgrade to solve some issues.
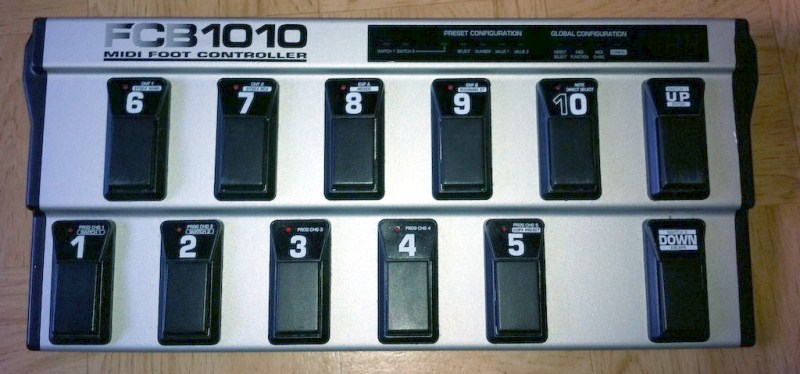
B. Behringer FCB 1010 "Short Mod"
There are many published modifications with full instructions in the internet, and one of those is the "short mod" or "cutdown mod". By doing this mod, you physically cut the right-most part of the pedal and remove the 2 expression pedals, keeping only the 12 foot switches.
- Pros: same as above, but in a smaller package at ~50cm wide.
- Cons: you lose your warranty and the power regulator must be relocated outside of the controller.
C. Korg EC-5
This is a much simpler, dumber and cheaper pedal than can be bought new for ~$90 USD. It's actually a plastic board of 5 foot switches directly wired to a 6-pin DIN output and it's specifically made for some Korg arranger keyboards, so the actual logic of the switches is built on the keyboard itself. This pedal could be used as the starting point for a custom project, in which I could hook-up an Arduino board to "read" from the mechanical foot switches and then generate and output a valid MIDI message signal through a custom adapter.
- Pros: very cheap and small, with the right amount of switches.
- Cons: made of plastic, requires an external custom adaptor
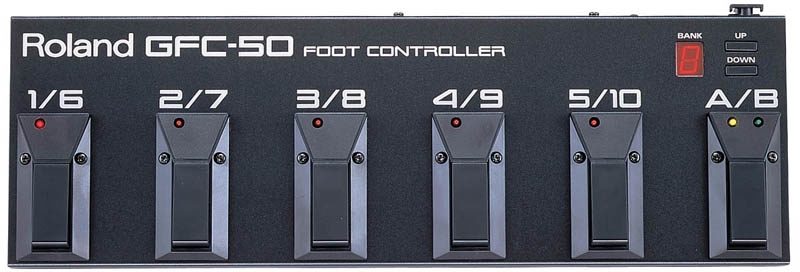
D. Roland GFC-50 / Boss FC-50
A pedal from the 90's, built like a tank, which has the classic Boss footswitches that I'm used to. Since it's a very old product, I have not been able to find a single resource online and the manuals might be lost to history. The product archive website does not have any kind of manuals or documentation, so I'm not sure if it's even configurable, or what are its actual capabilities. However, from some pictures online it appears to have just the right amount of pedals, in a manageable size (the website lists it as ~42 cm wide).
- Pros: Boss' exceptional build quality, good size, MIDI enabled
- Cons: it's a very old model from the 1990s, only available second-hand, actual capabilities unknown.
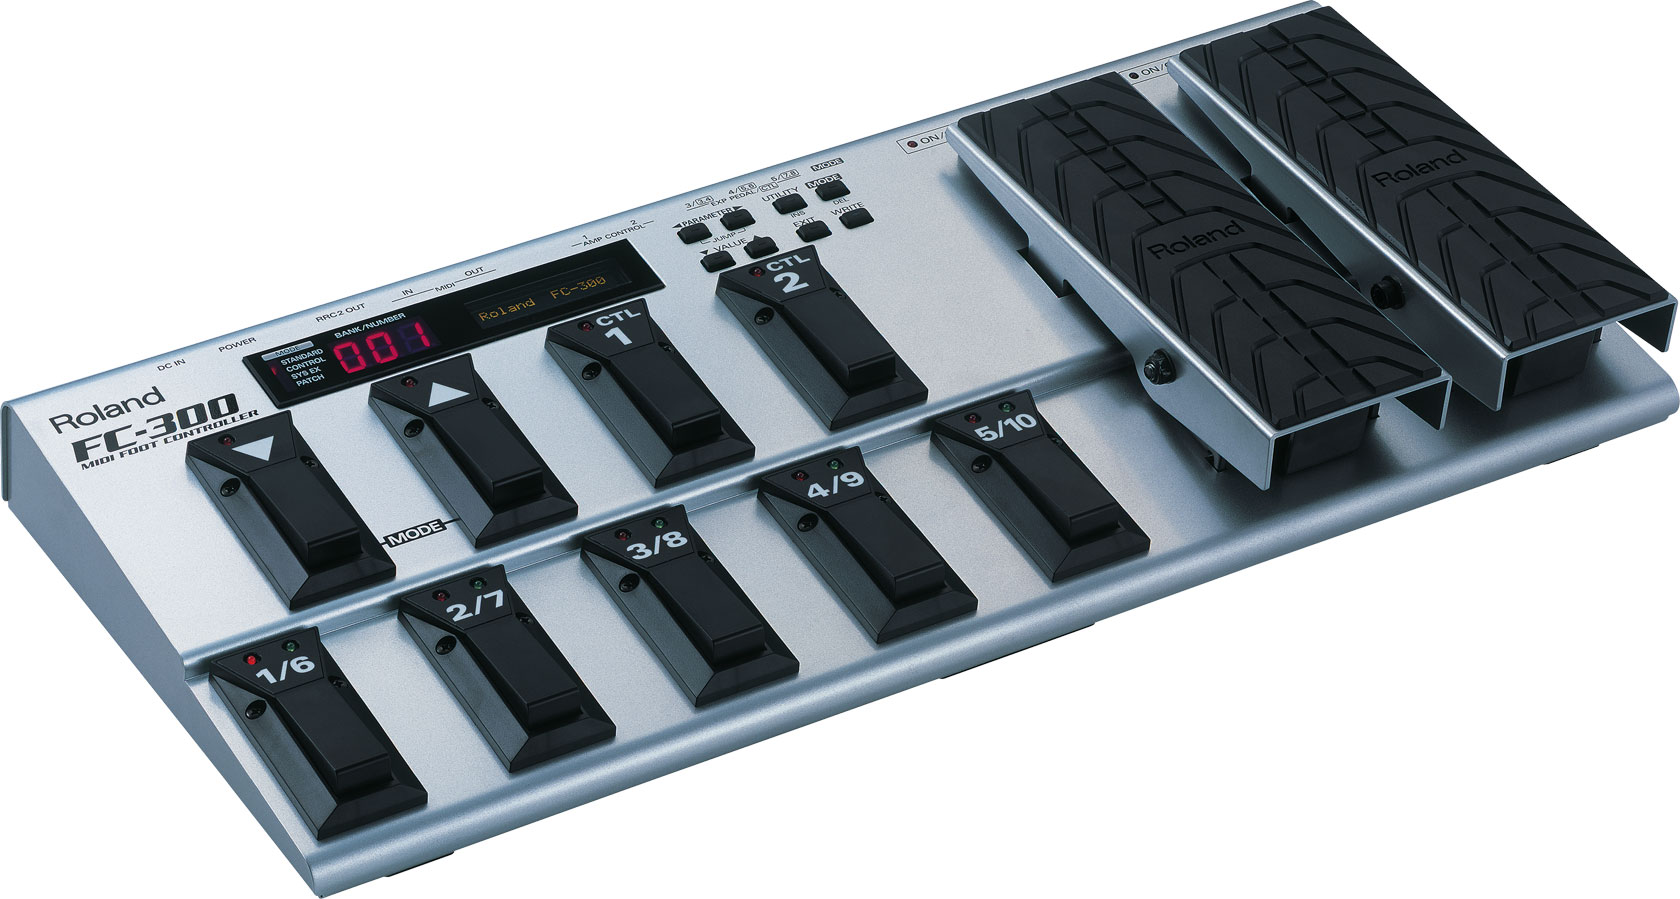
E. Roland FC-300
Roland's current flagship to control many of their MIDI-based effects processors and synthetizers. It's feature packed, highly configurable but at a price point of $500 USD it's definitely out of my budget. It costs way more than the actual looper.
- Pros: very nice build quality, durable, highly configurable
- Cons: too big, too expensive.
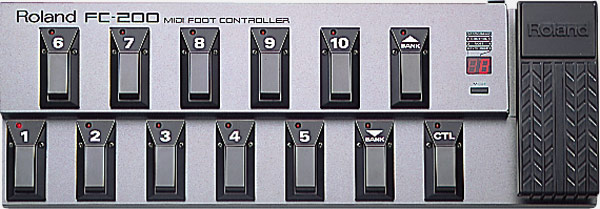
F. Roland FC-200
The previous version of the current FC-300, it's highly configurable with more foot switches than the current FC-300, which I like. This controller has been discontinued, but many units are available second hand. However, even buying it used is a more expensive FCB1010, while having pretty much the same functionality.
- Pros: nice build quality, good number of switches, MIDI enabled
- Cons: discontinued, too big, and only available second-hand but still expensive
The Custom Solution
Of the options above, I'd be more inclined to get a FCB 1010 and do the short mod, but it requires to purchase $180 USD of gear only to open it up and hacksaw it in half, and it would still not be exactly what I'm looking for.
What I've decided instead is to start a new project and build a custom controller. This way I can build it exactly as I want it, reuse some parts and gear that I already have, and learn in the process. I'm not sure if this will be cheaper than the modded FCB1010, but I'm certain it will be much more complicated and rewarding.
My main idea is to split the controller in two components:
- Pedalboard: The mechanical/physical footswitches.
- Bridge Contoller: A microcontroller reading any type of switch as inputs, and outputting standard MIDI messages or controlling a pair of relays.
The Bridge Controller
All of the interesting bits of wiring, electronics and programming will be contained in the Bridge Controller (the name I'm giving to the main control unit), while keeping the pedals as simple and dumb as possible. The idea is to make this unit very flexible to be able to use it as a generic "mechanical-switch-to-MIDI" bridge. This way I will have complete control over the programming, presets, functionality, and anything else really.
For the inputs, I'm planning on having 6 TRS jacks, where each TRS cable can handle 2 switches. This will allow me to hook-up as many as 12 footswitches if needed.
For the outputs, it will have:
- MIDI OUT, to send MIDI messages to compatible devices
- MIDI IN, to perform a soft thru function and pass through messages to the MIDI OUT, this will allow to daisy chain this controller in a more complex arrangement.
- 2 mechanical relays to simulate a footswitch when connecting to devices that do not support MIDI. These outputs could go into an amplifier channel switch jack or into a pedal's CTL1+CTL2 type of connectors.
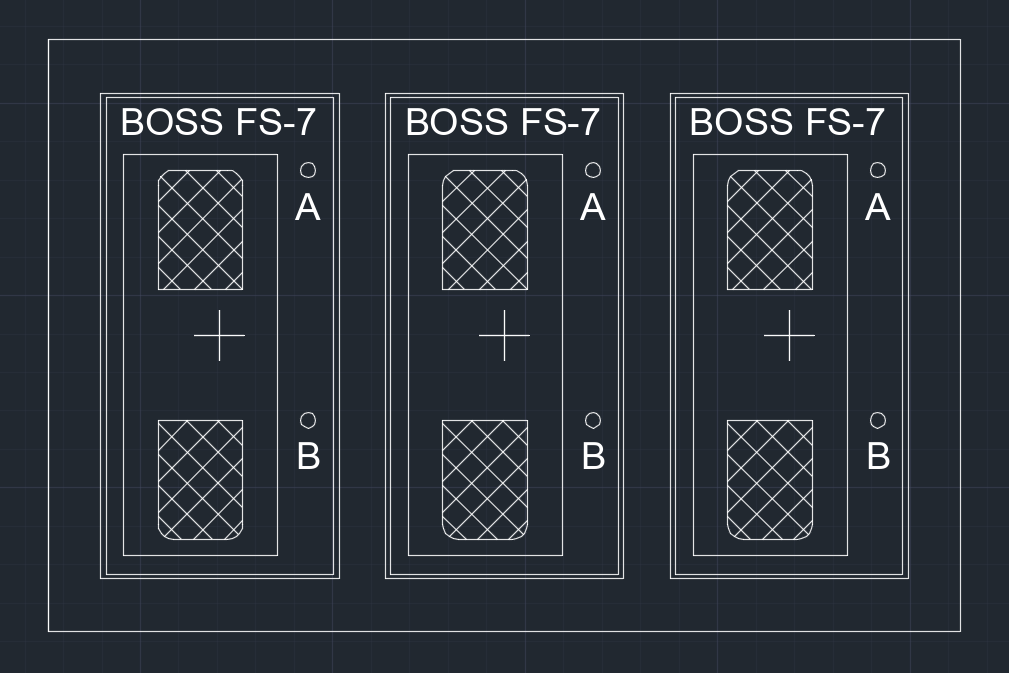
To use this with the RC-202 I will be using 3 double footswitches using the first 3 TRS inputs, for a total of 6 buttons. Of those, 4 switches will communicate via MIDI CC messages through the MIDI Out connector, while the remaining 2 switches will be connected to the CTL1+CTL2 input and will be simulated with the 2 relays in the Bridge Controller.
The Foot Switches
I have a couple of Boss FS-7 dual footswitches that I really like but I'm not longer using since I simplified my setup. The Boss FS-7 packs two footswitches in a small package measuring approximately 6x12cm. Also, unlike the bigger Boss FS-6, the FS-7 does not require batteries when operating as a simple momentary switch.
The build quality of the FS-7 is excellent as expected from Boss, and they're easy to find on stores everywhere, with a price ranging from $50 to $70 USD. This is definitely not the cheapest option at $25 to $35 USD per footswitch, specially when compared to the FCB1010 which has 12 footswitches for $180 USD, at ~$15 USD per footswitch. Still, I already have 2 of them so I only need to buy one more FS-7.
The good thing about this design is that I can add more footswitches as needed, and any kind of switch will do; be it a footswitch, a simple sustain pedal, a Korg EC-5, etc. Also, I can easily disassemble the pedalboard in case I need to use my FS-7s in other place.
I've drawn a mockup based on my real measurements of the FS-7, and it fits 6 pedals in a 24cm wide x 15cm deep board, while still being very usable.
Read the next part: Designing the Electronic Circuit
UPDATE: I never got around to building this project, instead I bought a Nektar Pacer MIDI Foot Controller which has pretty much all the functionality that I was planning for this build. You can read more about it here.